Navigation

July 14, 2010

Philipp Lahm Wedding


Philipp Lahm is team captain of German national FIFA football team, who just scored third place at the FIFA world championship in South Africa.

First thing he did when he came back to Munich was to marry his bride, Claudia Schattenberg. And as luck would have it he selected the St. Emmeran church of Kleinhelfendorf to do so. Just some of hundred meters away from where my studio is located.

So, I decided to play paparazzo and see what I could grab as a photo.

No question that about hundred true paparazzi were blocking my sight and -- as the number of them exceeded the population of Kleinhelfendorf ;) -- theirs as well. I can only say:

Bring your own ladder!


I am glad I don't have to earn my money this way. As soon as the bride entered the church, they started to run each other over in an attempt to be first to upload the photo. Of course, the 3G/UMTS infrastructure of Kleinhelfendorf wasn't really meant for this use case. To see scores of paparazzi left in frustration is a priceless experience :)

Also, chatting with some of the photographers, TV teams and moderators was interesting. I now have a better idea of the amount of money changing hands on events like this. Needless to say that the right to officially take photos was sold exclusively upfront.


Despite the competition for sight, I tried my luck and here is what I managed to achieve. Enjoy :)


(Click on the images to enlarge. All photos © 2010 Falk Lumo. No reprint or linking without permission. All and more photos available in high resolution.)

Just a closing remark after you have seen the images... I used my mountain bike to be ahead of the horse drawn wedding carriage on its path thru small and rural roads. After a few kilometers only I've seen no more paparazzi photographers. They don't try as hard as one would imagine... ;)

June 17, 2010

LumoLabs: Understanding Image Sharpness

We have prepared our first White Paper. It shall serve as a base to better understand our methodologies to measure image resolution and more importantly, it is meant to help understand what factors can prevent an image from turning out tac-sharp.


LumoLabs website

We changed the layout of our site too.

LumoLabs is now at www.falklumo.com/lumolabs and hosts a repository of articles.

Therefore, we will use the blog to announce new articles or important updates to followers and interested parties. And to enable their discussion.

The actual articles are not posted as a blog article as its format was deemed unsuitable. But you'll find links to both the online article and a printable PDF version. If possible, we always recommend to download and read the PDF version. The PDF version does update more frequently too ;)


Understanding Image Sharpness


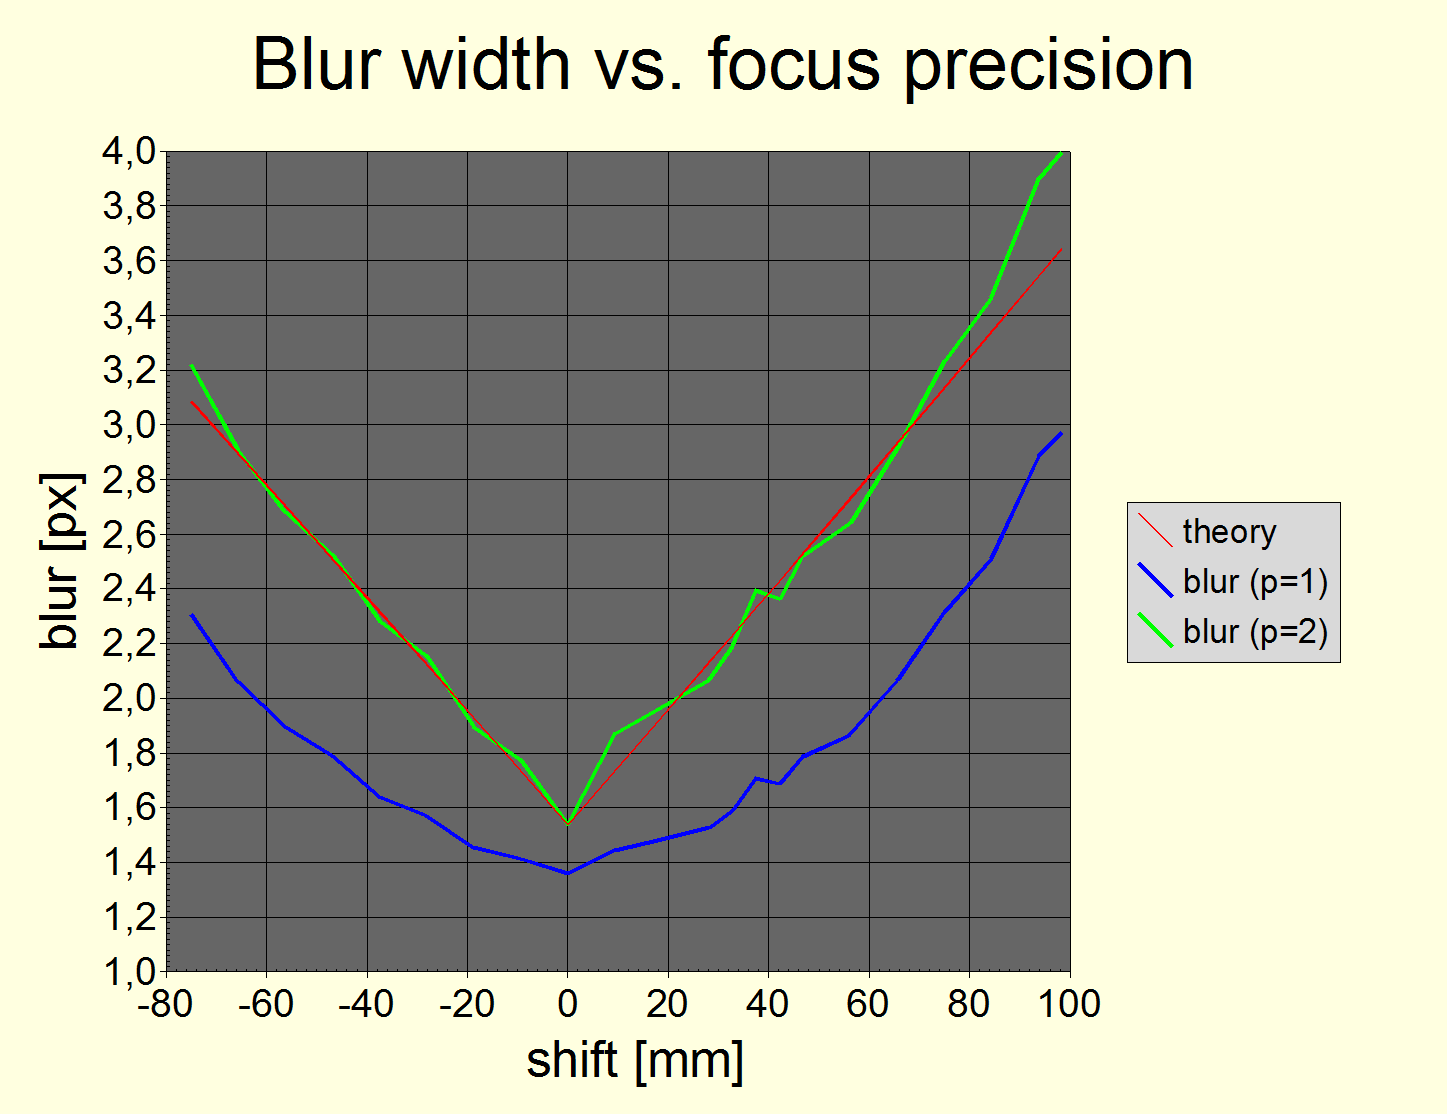
(Sample chart form the article)
Hint: The article image URLs actually open as larger images as they appear embedded in the article.


This article is a recommended read for anybody loving to dig into technology and who isn't afraid of a bit of math.

It's abstract and table of contents is:

Abstract
This White Paper is one in a series of articles discussing various aspects in obtaining sharp photographs such as obtaining sharp focus, avoiding shake and motion blur, possible lens resolution etc. This paper tries to provide a common basis for a quantitative discussion of these aspects.

Table of Content
1. Measures
1.1. Modular Transfer Function
1.2. Blur
1.2.1. The hard pixel
1.2.2. The perfect pixel
1.2.3. The real pixel, sharp and soft
1.3. More realistic resolution measures
1.4. Combining blur
2. Sources of blur
2.1. Defocus
2.1.1. Ability of deconvolution operators to reduce defocus blur
2.2. Bayer matrix and anti aliasing
2.3. Diffraction
2.4. Lens aberrations
2.4.1. Defocus, Spherical aberration, Coma, Astigmatism
2.5. Shake
2.5.1. Measuring shake
2.5.2. Expected shake
2.5.3. Empirical results
2.5.4. Tripod classification
2.6. Motion blur
2.7. Noise
2.8. Atmospheric perturbations
2.9. Precision and calibration
3. Practical considerations and examples


Please, proceed here:


June 10, 2010

Apple iPhone 4 camera specs


On 2010, June 7 His Steveness has introduced the Apple iPhone 4 which features a new camera module. Two actually but I am going to talk about the main camera (on its rear side) only. And only about its still photography capabilities (it records 720p 30fps HD video as well).

It is typically hard to figure out the exact camera specification for cell phones and to compare them with a P&S camera. E.g., the HTC EVO 4G is said to have an 8 megapixel camera but little else is known. Images shot with the EVO all lack the significant EXIF information!

However, I think I managed to extract the full iPhone 4 camera specs now.

First, the pixels are 1.75 µm (according to Job's keynote) and we may assume that this is the pixel pitch. Sample images are 2592x1936 pixels (5.0 MP, 4.02:3). This makes a 4.54 x 3.39 mm^2 chip (5.67 mm diagonal) which corresponds to a 35mm film camera crop factor of 7.64.

In a P&S, this would be called a 1/3.2" sensor and P&S sensors range between 1/3.8" and 1/1.5" (crop factors between 8.6 and 3.9). So, it is an imaging sensor at the lower end of the P&S range, but it is in the P&S range and with a reasonable number of pixels and a back-illuminated sensor like the Sony Exmor R sensor. Here is a sample image from Apple's web site:


(click on the image for the sample in original size; hosted on apple.com)

Gizmodo.de has published the full EXIF data for exactly this sample photo (it is magically absent from the web sample though ...):
Aperture: 2.97
Color space: Uncalibrated
Date and time: 2010/05/07 15:14
Exposure: Auto exposure
Exposure time: 1/887
Flash: Flash did not fire, auto mode
FNumber: 2.8
Focal length: 3.85
ISO speed rating: 80
Metering mode: Spot
Sharpness: Hard
White balance: Auto


So, the lens is a 3.85 mm f/2.8 lens.

This corresponds to 35mm film camera equivalent lens of 29.4mm f/21.4.

I should note that even an aperture this small is not restricted by diffraction yet (limit at f/2.8 is at 54% of pixel width). This is a good value. But one really shouldn't stop down beyond f/4 and it seems the iPhone 4 has an f/3 fixed aperture lens anyway.


Summary

iPhone 4 main camera:
  • 5.0 Mpixels (2592 x 1936)
  • 1/3.2" back-illuminated CMOS sensor
  • 4:3 aspect ratio
  • 35 mm film camera crop factor: 7.64
  • Low ISO 80 (or better)
  • 3.85 mm lens focal length
  • f/2.8 lens aperture
  • Autofocus: tap to focus

Equivalent 35mm film camera and lens:
  • 30 mm f/22

So, don't throw away your FourThird, APS-C or full frame SLR ;)

Besides the deep depth of field, an f/21.4 aperture at ISO 80 produces as much noise as an f/8 lens at ISO 570 (for a given shutter speed). Where 35mm film camera f/8 and APS-C f/5.6 produce the same level of noise.


Conclusion

The iPhone 4 seems to have a camera which should deliver an image quality on par with the lower segment of P&S cameras. It's field of view (no zoom!) corresponds to a 30mm lens (on a 35mm film camera) and it captures as much light (produces as much noise) as a system camera with a lens aperture between f/11 (FourThird) and f/22 (35mm film).

April 14, 2010

Pentax shake reduction revisited

Update (April 18, 2010) Breaking News

The entire blog article may only apply to Pentax K-7 with firmware up to 1.00.02.xx with yet to be determined xx. Rüdiger from a German forum has done more measurements with 1.03 which seem to indicate this. I'll keep you updated.

End of Update.


This is a first for me. Because I am going to write about results obtained by others.

Nevertheless, I hope to be able to shed some new light onto an old question: How well does the Pentax shake reduction system work? The result may be surprising which is why I post this article.


1. Information sources

1.1 First and foremost, the admirable work by P. Smith for the Pentax K-7:
- Study of the Effectiveness of Shake Reduction in the Pentax K7
- Discussion of the above original work

1.2 Article by German magazines:
- ColorFoto 7/2008 "8 Bildstabilisatoren von 8 Herstellern"
- Pentax measurement chart contained therein
- ColorFoto 1/2010 "14 Bildstabilisatoren" (only available as print, pp.26-32).

1.3 Own work:
- Quick tests with my K-7
- Re-evaluation of data originally published by P.Smith
- Proposed mathematical model

Let me add that all data I am using (except my own quick tests) are based on a careful examination of edge blur widths (and their variation). Note that edge blur widths can be computed with high subpixel accuracy using the slanted edge method as all sources above do. They compare the shake (motion blur) with static blur caused by the sensor and lens too. Comparisons based on "percentage of useful shots" are not meaningful enough and therefore, haven't been used.

The work of P. Smith uses the Smith shake device aka as his body. The work of ColorFoto uses Steve aka Stabilization Evaluation Equipment which is an apparatus build exclusively for ColorFoto magazine. It was set to a mean shake frequency of 4 Hz and 0.2° amplitude. AFAIK, the shake isn't harmonic which is good.


2. Scope of the work

Aquiring a better understanding of the Pentax SR system. I am not in the boat to examine the 1/100s "SR bug" some report for the K-x and others deny. However, my article may help decide what is a bug and what isn't. My article will also help understand the performance differences of a sensor based system vs. an optical system.


3. A little background

Pentax uses sensor shift-based image stabilization (SR aka shake reduction). It is based on two (or three) angular velocity (gyro) sensors. More about the sensors:
- maRata Gyrostar ENC-03R

The measured angular velocities means that the body knows how the lens pointing direction is shaking and can shift the sensor to compensate. Unlike in-lens systems, it can even compensate for rotations around the axis which are not to be neglected. P. Smith has compiled a number of documents from the Pentax patent application:
- Pentax patents collected by P. Smith

Vendors with sensor-shift based image stabilization include Olympus, Pentax and Sony. Vendors with lens-tilt based image stabilization include Nikon, Canon and Sigma. A few lenses with lens-based stabilization for Pentax exist from Sigma. All systems are actively powered.

It is commonly accepted that neither system is superior to the other. I'll spend a few words on this later. No existing system works in the macro range. Canon has filed a patent requiring additional sensors to address this.


4. A fresh look at existing data


© 2010: measurement data: P. Smith; chart: F. Lumo.

This plot shows the blur width (in pixels) due to shake induced motion blur as a function of exposure time (in milli seconds; e.g., 1/125s = 8ms). The data is taken from the work by P. Smith as cited above. The red curve above is without shake reduction, the green curve is with shake reduction enabled. The thin lines denote upper and lower error margins (based on standard deviation and N=10 sample size). The dashed lines denote a fitted linear line thru the origin.

The camera used (Pentax K-7) has 5 µm pixels and the lens (Sigma 50/2.8 Macro) has 50 mm focal length.


This plot is the same as above with both axes in logarithmic scale. The green dashed line shows a linear line thru zero blur at 44 ms.

It turns out that all data by P. Smith are (within margins of statistical and systematic errors) compatible with the following formula (dotted lines in the above log-log plot):

b = a f |t - t0|

where b be the blur width (e.g., in µm),
a and t0 are constants,
and f be the focal length (e.g., in mm)
and t be the exposure time (e.g., in ms).

and where values are as follows:

SR OFF:
t0 = 0
a = 1 / (280 s)
(of course, a as above is a measurement of P. Smith's body tremor ;) )

SR ON:
t0 = 44 ms
a = 1 / (1200 s)

and b_SRON actually is the minimum of the above formula and b_SROFF. The crossover where b_SRON actually becomes b_SROFF is at t=8ms or 1/125s. For faster shutter speeds, the SR system has no effect (at 50mm focal speed).

The standard deviation of blur width is about the same size as the blur width itself, for both SR on and off.

This corresponds to an advantage of 2.1 stops within a nice range and actually better (~4 stops) around 1/20s - 1/25s. Persons with stronger tremor may see a better reduction.

The nice things about this formula is that we can compute the range of permissable shutter speeds, given a blur width and focal length.


5. Claim

The Pentax formula above holds true for all focal lengths.


6. Backing it up

Wait a second! If true, this claim means that the Pentax SR mechanism isn't able to help aquiring tac-sharp images with long focal lengths! Because below 1/125s, SR basically won't help anymore. It does help aquiring accepable images at maybe 1/50s and 200mm. But not tac-sharp at maybe 1/150s and 200mm. This may then require 1/400s actually, where SR on or off wouldn't matter anyway.

Because this claim is not to be made light-heartedly, I will use more sources to confirm it.

First, my own informal tests involving a visual inspection of images taken with a 300mm lens, at 1/320s, 1/160s, 1/100s, 1/25s, SR ON and OFF: the blur doesn't seem to depend on SR on or off with 1/320s, 1/160s, 1/100s. Blur was less at 1/25s with SR on but still a little bit more than at 1/160s with SR on or off.

Because this quick test isn't academic enough, I consult two additional sources: The ColorFoto tests from 2008 (K20D) and 2010 (K-7). The former measurement chart is online and I try to embedd it here (if it doesn't display, follow the link in the sources section):

© 2008 ColorFoto

We need to look at the second chart here, taken at 130mm and 1/125s. The red bar is with SR off and the dark blue bar to the right is with SR on. As you can see, both bars are roughly of same height, i.e., ColorFoto found SR ineffective at 130mm and 1/125s with the K20D. They actually found blur to be less at 1/15s than at 1/125s...

Now in 2010, I have the paper source for the same test with the K-7 and DA60-250 at 130mm at my disposition. Result: SR on (compared to SR off) has a positive effect of only 10% at 1/200s and maybe 20% at 1/100s. In a range of 1/200s to 1/13s, it remains at about 1 to 1.5 pixels as opposed to 0.5 pixels with tripod. Which is excellent at 1/13s but not so good at 1/200s. Their same curve at 23mm focal length reveals contant, tripod-like blur between 1/30s and 1/8s and even at 1s, only 2px blur. Their result is a little bit less irritating than the earlier K20D result in so far as shorter exposure times didn't lead to more blur.

These are two independent measurements basically coming to the same result: The Pentax SR is designed "to kick in" at exposures longer than about 1/50s.

This leads me to make my claim above.


7. Compared to the competition

In their 2010 study, ColorFoto compared the following SR systems, both at 35mm equivalent and 200mm equivalent focal lengths (FT and APS-C sensors).

35mm: (improvement in stops vs. 1/30s):
Nikon 18-200 VR II: 5
Olympus E3: 5
Panasonic GH1: 3
Sigma 18-50: 3
Pentax K-7: 3 (*)
Canon 18-135: 1
Sony A380: 1
Tamron 17-50: 0

200mm:
Olympus E3: 3
Panasonic GH1: 2
Canon 18-135: 1
Nikon 18-200 VR II: 1
Tamron 18-270: 1
Sony 70-300: 1
Canon 100: 0
Nikon 70-200 VR: 0
Sigma 70-300: 0
Pentax K-7: 0 (*)

(*) I define the number of stops improvement by the time where blur becomes more than 120% compared to a tripod shot, using the 1/focal-s rule to define the 0 stop point. The K-7 had more published shake without SR than the others which can only mean that the higher resolution wasn't corrected for. So, it was ok to add 1 stop to Pentax results (and avoid a -1 stop improvement listing ;) ).

So, all vendors have a common problem already at 100mm (FT) and 130mm (APS-C) focal lengths. At the long end, the best and the worst result are from sensor-shift based systems. At the wide end, they are mixed as well. So, differences are always due to the particular implementation details and not the principle as such.

Looking at results in more detail, I can see the "kick in effect" for the following systems: Tamron 18-270, Nikon 70-200 VR, Canon 100, Sigma 70-300 and Pentax K-7. So, it isn't a system-immanent effect.


8. Pentax SR usage guide

One can compile a usage guide of good exposure times based on the formula given above. This is possible because we can now assume that it holds true for all focal lengths.

The above is a 2D plot of ranges of good combinations of exposure time and focal length. The bright green (tack-sharp) represents 1 µm extra blur due to shake or better (0.2 pixels), the red (blurry) represents 20 µm blur or worse (4 pixels). The two darker shades of green (sharp and soft) represent degrees of blur, which are bearly or clearly noticeable at the 100% crop level.

The border between the two darker green regions represents the standard 135-format 1/f rule (1/(1.5*f) in APS-C land).

The blue or lilac region (blurred) represents a region where blur is obvious but not ruining the shot when looked at from the normal viewing distance: 20µm or 0.02mm is the traditional circle of confusion diameter for depth of field calculations.

One may think that the level of DoF-kind of sharpness be good enough. It depends on the subject. Because a crop from a shorter focal length would have done as well then. Sometimes, the longer focal length would still be the better choice because it collects more light (less noise than the crop) and allows for better focussing.

(Note: the chart and chart description was updated 2010, April 16.)


As can be seen, for focal lengths larger than 100mm, it is getting increasingly difficult or impossible to obtain the required sharpness from the SR mechanism and one has to use the good old rule of thumb. Nevertheless, if one shoots at 200mm and is accepting 1 pixel motion blur, then the avaible range is extended down from about 1/150s to 1/25s or 1/15s even, with the region around 1/100s to be avoided!

One may think that adding a tele lens from Sigma with lens-based stabilization could deliver more headroom for long range tele photo shots. In theory, this may be true. But it remains to be seen if the image stabilization mechanism made by Sigma can deliver for longer focal lengths. It may well be limited to the wide end as well. Additional tests would be required to answer this question.


9. Conclusion

Pentax delivers a capable shake reduction system able to provide up to 4 stops stabilization. However, it is designed to work best at exposure time around 1/20s and therefore, is most useful for normal and wide angle lenses used at low light or in video. Starting at around 100mm focal length, it is increasingly unlikely to see a positive effect from the SR system and beyond 200mm, the SR system cannot be used anymore to produce tac-shap images at lower than usual exposure times.

Olympus shows that this isn't a principle limitation of sensor-shift by delivering best stabilization for longer focal lengths (as far as I am aware of tests). So, there is hope that a future installment of the Pentax SR system is more useful for long focal lengths.

I call it "Tele-SR" and say to Pentax: I want it and I want it now :)


Thanks for stopping by.

April 5, 2010

LumoLabs: HowTo long range telephoto shots


It all started when I shot the sunset panorama below from one of the locations where I work. It shows a horizontal field of view comparable to a 60mm lens on a 35mm film camera. There is nothing exceptional about this panorama except maybe that it shows -- on the righthand side -- the Zugspitze which happens to be Germany's highest mountain.

Zugspitze I
The Zugspitze is 2962 m (or 9718 Ft) high and from the point where the photo was taken, exactly 83.39 km (or 52 miles) away. So, I thought it may be a good idea to crop into that image and look what guys are doing up there on mountain top ;)

Theoretically, such a crop should be feasible because the image actually was stitched from several images taken with the FA* 300mm f/4.5 lens on the Pentax K-7 each. So, a pixel corresponds to as little as 1.4 m up there on mountain top and this excellent lens clearly outresolves the sensor.

Below is what the crop (100% pixel level and corresponding to a 2000mm lens on 35mm film) looks like:

Zugspitze II
Really looks blurry as if it were out of focus or having motion blur. Actually, razor-sharp trees in 300 m distance point out that this may play a role as well. Because 300 m isn't within hyperfocal distance for 5µm at f/8. But as we'll see, we can actually ignore this little detail.

Lesson #1: Focus on something about 1-2 miles away (i.e., which is within hyperfocal distance for a 5µm circle of confusion) because infinity may be too blurry to focus at and more nearby objects may be, well too nearby.

As it turns out, the real problem actually is that large distance objects look blurry indeed (no wonder the auto focus didn't properly lock on them).

So, I ask myself the question how sharp to expect an object at a given distance to appear?

There is scientific literature about this but I couldn't find anything accessible to photographers. So, I decided to compile a little How To guide. Starting now ...


1. Possible optical resolutions for long range tele photographs taken in the atmosphere

Of course, photos taken outside the atmosphere aren't the most important category for most people reading this ;)

Another category are photos taken from the atmosphere into outer space (astro photography) and a common figure one is finding is to expect resolutions of up to 1 arcsec resolution but no better. In nights with very low atmospheric turbulence aka as excellent "Seeing". When the stars blink less than they usually do ;) This is related to the Fried parameter r0 which is about 5cm (sea level) to 20cm (in the mountains at a very good night) large. It isn't possible to achieve better resolution than with a diffraction-limited lens with diameter r0.

A lens with diameter 300mm/8 or 38mm (<r0) isn't limited by atmospheric turbulences. However, the turbulences vary at a time scale of t0 = 0.3 r0 / v_wind and with typical values of v_wind = 2 m/s (10 m above ground) we obtain t0 ~ 1/125s.

For anything slower than t0, we effectively smear out the turbulent perturbations and decrease the resolution.

Lesson #2: Shoot at 1/125s or less, even when on a tripod :)

Of course, I wasn't aware of this and used 1/25s. But as we shall see, this isn't a big problem either. Because for excellent results, we need extremely low noise (lower than at ISO 100) and will need a long effective exposure time.

One way would be to adaptively restore turbulent distortion using a parameterized grid and stacking many restored image frames. Which is nothing but applying adaptive optics.

Another and more practically feasible way is to accept the loss in resolution due to atmospheric turbulence. But how large is it?

Well, I managed to find a formula in the scientific literature and adapt it for an optical path with constant atmospheric conditions:

MTF_turbulence(f) = exp (-21.57 f^(5/3) lambda^(-1/3) Cn^2 L)

where:

MTF: Atmospheric modular transfer function
for turbulent distortions along a horizontal path [%].
f: angular spatial frequency [cycles/rad].
Cn^2: (refractive-index structure coefficient),
typically between 10^-15 and 10^-13 [m^(-2/3)].
lambda: wavelength e.g. 0.55 [µm].
L: pathlength e.g. 83.39 [km].

Source: R. E. Hufnagel and N. R. Stanley, "Modulation transfer function through turbulent media", J. Opt. Soc. Am. 54, 52–61 (1964).

A public online source (i.e., free of charge) discussing this formula is I. Dror and N. S. Kopeika, "Experimental comparison of turbulence modulation transfer function and aerosol modulation transfer function through the open atmosphere", (1995).

Be f = L / (2 x) where x is the size of the smallest resolved detail. Then I derive that the limiting resolving power (i.e. where MTF drops to 5.0%) is reached where

x = (L / L1)^1.6

where L1 = (1.633 * (Cn^2)^0.6 * lambda^-0.2)^(-5/8) is the distance where a 1m-sized detail can be resolved. Typical values are:

L1 = 50,000 [m^0.375] for weak turbulences (good seeing),
L1 = 20,000 [m^0.375] for normal turbulences,
L1 = 10,000 [m^0.375] for strong turbulences.


This formula as it stands is my own work and I hope it may be of good use for fellow photographers. The L1 values are slightly rounded (~10%) from the results using the typically rounded values for Cn^2 as given above. However, my table below uses L1 values as computed from the rounded Cn^2 values.

MTF jumps from 5% to about 40% for details twice as large (2x) and drops to below 0.01% for details half the size (x/2). So, there really isn't a reason to use more than one pixel per detail x and the maximum useful focal length can be computed from the above. The following table does so and assumes 5µm large pixels:


Distance [m]
max. focal [mm] (5 µm pixel)
Seeing:

good


normal


bad


1
171.410
43.056
10.815
2
113.088
28.406
7.135
5
65.261
16.393
4.118
10
43.056
10.815
2.717
20
28.406
7.135
1.792
50
16.393
4.118
1.034
100
10.815
2.717
682
200
7.135
1.792
450
500
4.118
1.034
260
1.000
2.717
682
171
2.000
1.792
450
113
5.000
1.034
260
65
10.000
682
171
43
20.000
450
113
28
50.000
260
65
16
100.000
171
43
11
200.000
113
28
7

This means that you don't have to care about atmospheric turbulence if you shoot shorter than 200 m only (assuming your longest lens is 500mm).

In all other cases, turbulence may be of concern. Typically, it may not be useful to shoot more far than 1 mile away. Because you would be tempted to use your longer than 500mm which then resolves worse than 500mm.

Lesson #3: Don't shoot your 20+ Gigapixel panorama at a day with just "normal" atmospheric turbulences.

Lesson #4: Wildlife photographers wanting to resolve 1mm at a bad Seeing condition day (like in Africa) either approach to at least 100m or use 1000mm f/22 (r0!) 1/250s (t0!) which applying the Sunny 16 rule, means a tripod and ISO 400...


2. Possible optical contrast for long range tele photographs taken in the atmosphere

So far, we looked at a loss of resolution due to atmospheric turbulences. While being the strongest enemy for astro photography (besides light pollution), it isn't for long range tele photographs. While crystal-clear days exist where it is possible to view 200 km far away (on a mountain), other days clearly exist where vision is limited to a few meters only (fog).

The normal is somewhere in between where aerosol particles (due to condensed water, smoke etc.) scatter light along its path thru the atmosphere and dramatically lower the MTF with distance. The effect is much more dependent on distance than on detail size which is why we tend to not even see the object at all. Nevertheless, if we see a distant object it may be at very low contrast only. Formulas exist for MTF due to atmospheric aerosol scattering. They only mean that the useful range of tele photo lenses is limited even more.

To make things more fun, turbulence and aerosol scattering counteract each other. Dry air normally means less aerosol scattering but more turbulences too due to the heat which dried the air in the first place.

Low contrast is of double concern. Because we may wish to reconstruct missing detail which is only possible for high signal to noise ratios.


3. Improving long range tele photographs

We will apply a three step procedure to improve our tele photographs. Note that this will only be applicable for static subjects, though.


Step 1: Improve the signal to noise ratio

I took 16 images and selected the best 10 of them. Then, I used PhotoAcute to align and stack them into a "superresolved" image with a signal to noise ratio corresponding to ISO 10:

Zugspitze III
If you click onto the photo and select "Original size", you'll see that the image is twice as large. But not sharp. PhotoAcute's superresolution technique actually works for images which are sharp in the first place. Here, we only used it to boost the signal to noise ratio. Parameters used are a Nikon D40 camera with Sigma 30mm/1.4 lens, a combination I found particlarly neutral, i.e., PhotoAcute doesn't try to deconvolve for lens aberrations too much ;)


Step 2: Sharpening

The next step is a restauration of image sharpness using a deconvolution technique. FocusMagic seems to deliver best results, even in the case here where the defocus' point spread function doesn't strictly apply.

Zugspitze IV
The sharpness is clearly improved. I used a blur radius of 6 pixels (after scaling the image back to 50% size). And "Forensic" regularization, made feasible by the stacking in the prior step. There is a window reflecting the sun. And because being 83 km away, it should be a perfect point. The ring artefact is a sign that a different deconvolution kernel would have yielded better results.


Step 3: Contrast enhancement

The last step is boosting the contrast within the given area. All tone values are typically within just a small range and the first step is clipping. The remaining tone mapping may be done using a gamma correction and a dose of clarity.

Zugspitze V
This resulting image may not be the most beautiful image of the top of the Zugspitze mountain. Nevertheless, from 83 km away, it not only shows a radio emmitter pole which is 4 m wide at its base and 2 m wide at its middle portion. It even shows (in the background on the right side at a 45° angle) the steel cables of the Austrian side funicular. It doesn't resolve the individual cables. But imaging them at all from more than 50 miles away is ... well, interesting ;)

Lesson #5: Burst enough images to be able to boost contrast.

Lesson #6: Stock up on a bunch of capable post-processing tools.


I hope you enjoyed the read.


4. Links

  1. I. Dror and N. S. Kopeika, "Experimental comparison of turbulence modulation transfer function and aerosol modulation transfer function through the open atmosphere", (1995)
  2. PhotoAcute
  3. FocusMagic